How to export multiple artboards to separate print-ready PDFs in Adobe Illustrator
May 03, 2023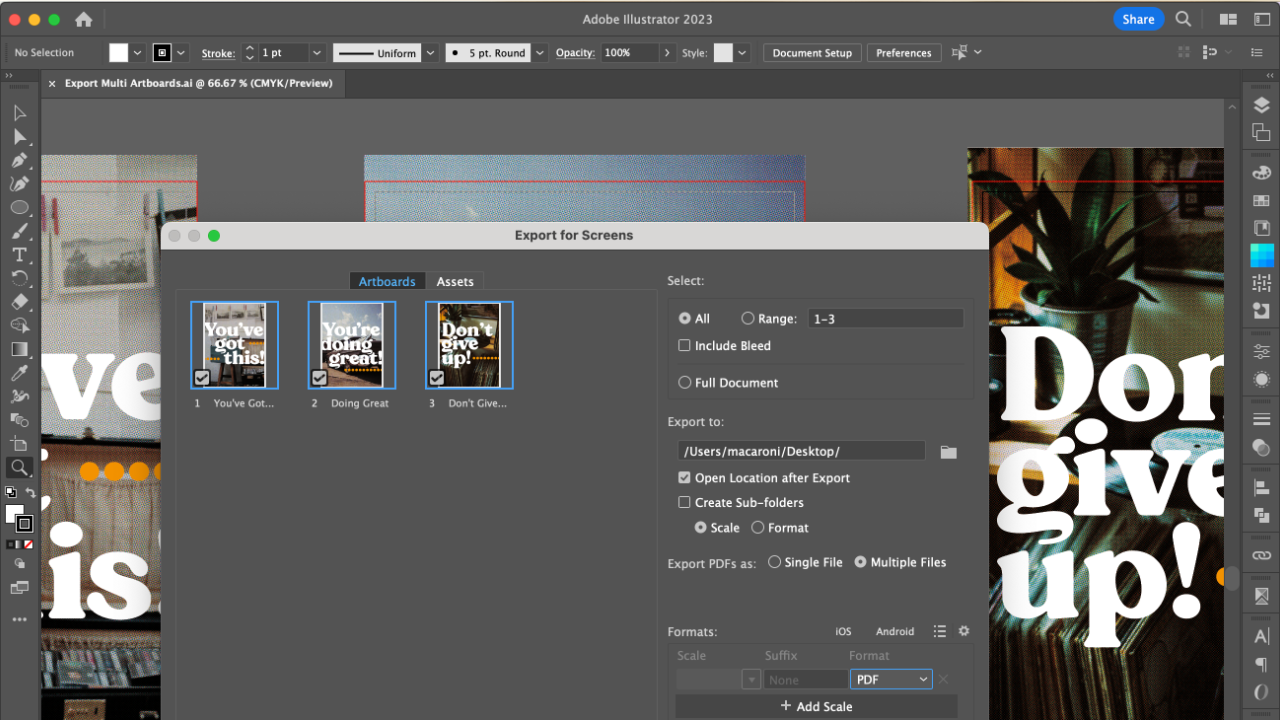
Let's say you're in Illustrator and you’re designing a simple print project where you have designs on multiple artboards and they’re all going to be separate print jobs. Maybe something like a set of single-sided postcards. Now it’s time to export them with crop marks and bleed. If you’re using Illustrator’s typical Save As PDF window, you would have to export each one individually which can be tedious and time-consuming.
That's where this trick comes in handy! So, this is how to export multiple artboards as separate PDFs with crop marks and bleed in Adobe Illustrator. Let's get started!
Step 1: Set up your bleed
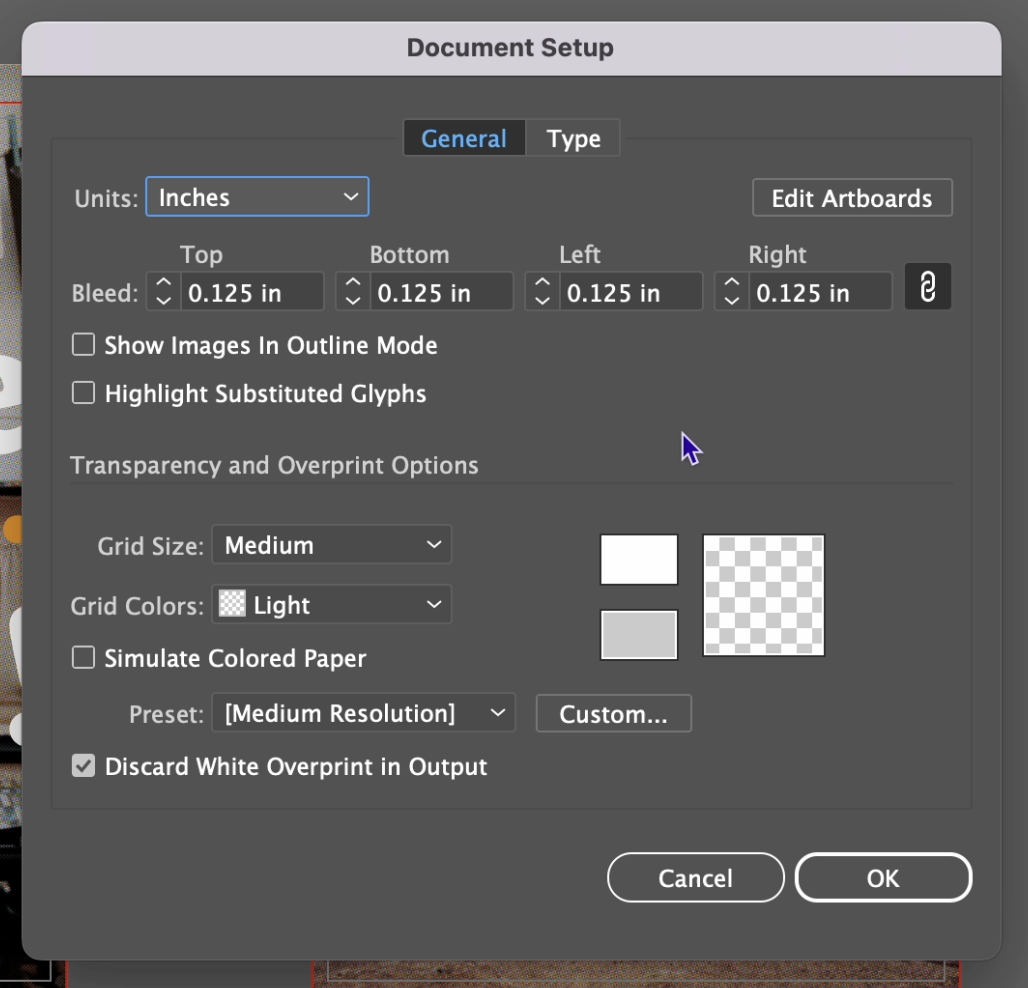
Before we begin, bleed is a must on your print projects to ensure that your final printed design looks nice and clean around the edges. Bleed is the extra space beyond the edge of your design, so if any of your artwork touches the edge or ‘bleeds’ off you need bleed. The standard for bleed is an eighth of an inch all the way around but check with your printer just in case.
If you need to set up your bleed, head over to Document Setup, adjust your bleed size, and ensure it's consistent across your document.
Step 2: Make a PDF preset
Creating a PDF preset will save you time and streamline the export process. To create a PDF preset, go to File > Save As and select Adobe PDF.
Click on the High-Quality Print preset, as it provides a good baseline for PDFs since it has the least amount of forced color conversions etc. Click Marks and Bleeds in the left sidebar then under Printers Marks select "Trim Marks" and choose "Use Document Bleed Settings.” (This is why it’s important to have your bleed in your document set up correctly.) Click on the Download button in the top right

Then name your preset. For example, "Crops + Bleed."
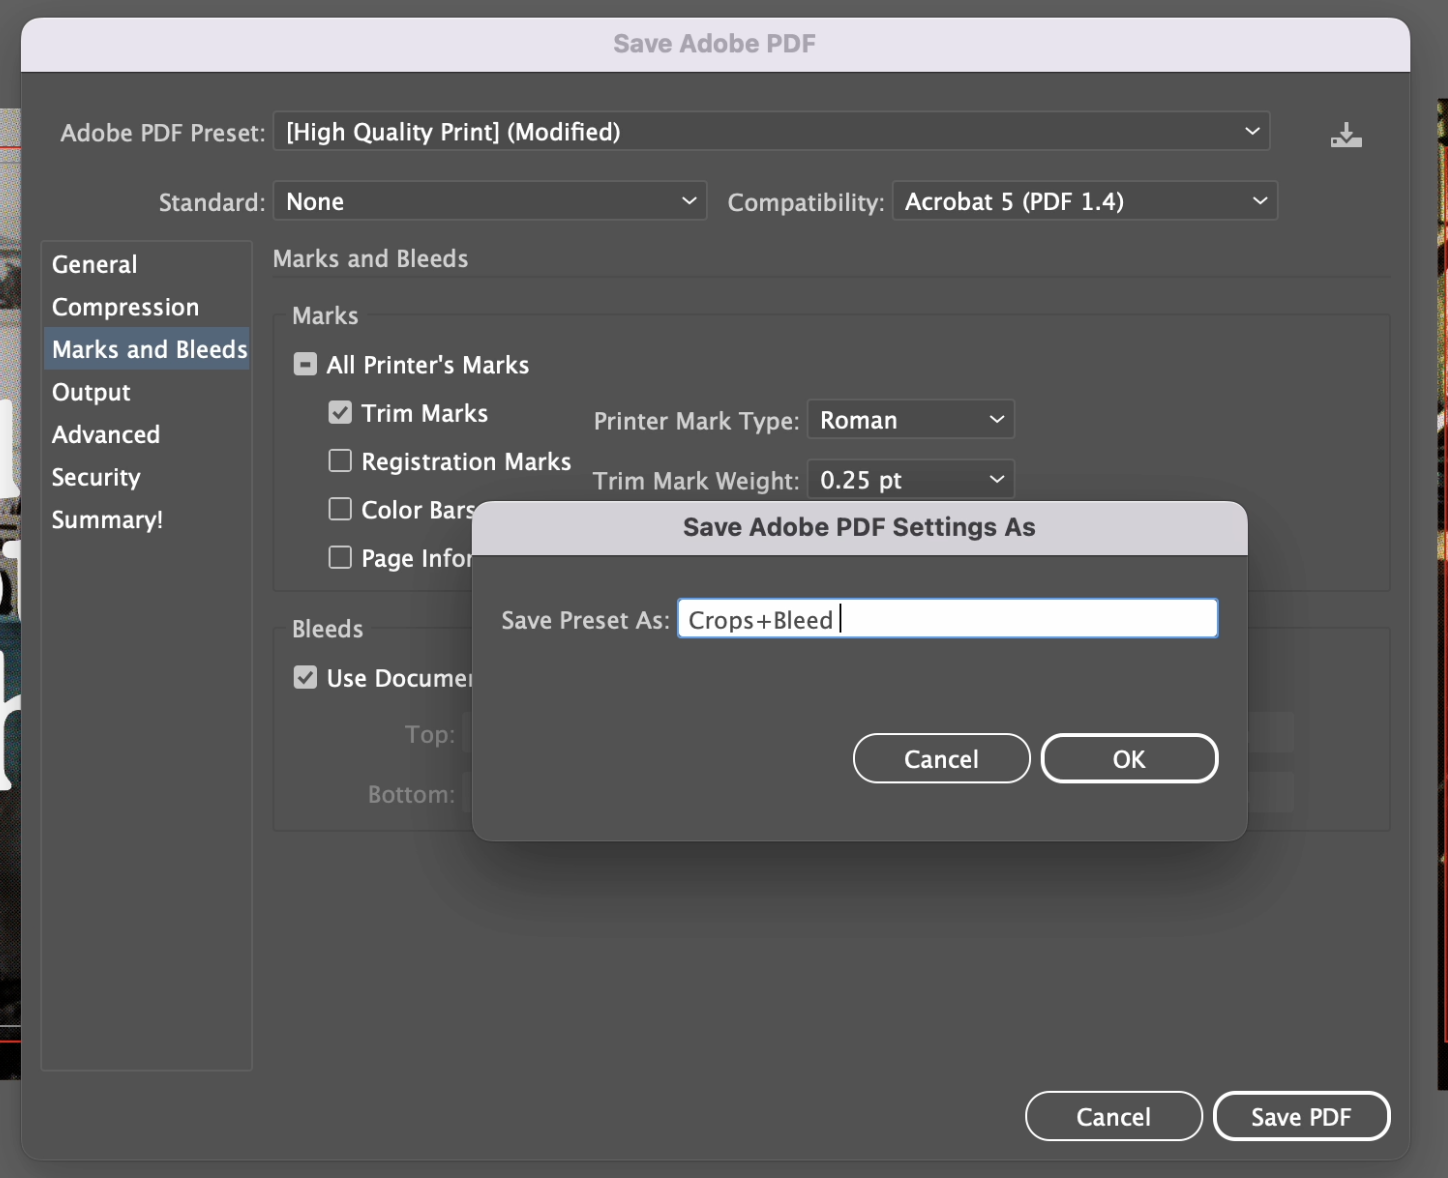
Click OK, and your preset is now saved. You can now click CANCEL on this window, since we don’t need to save the PDF this was just all about creating the preset.
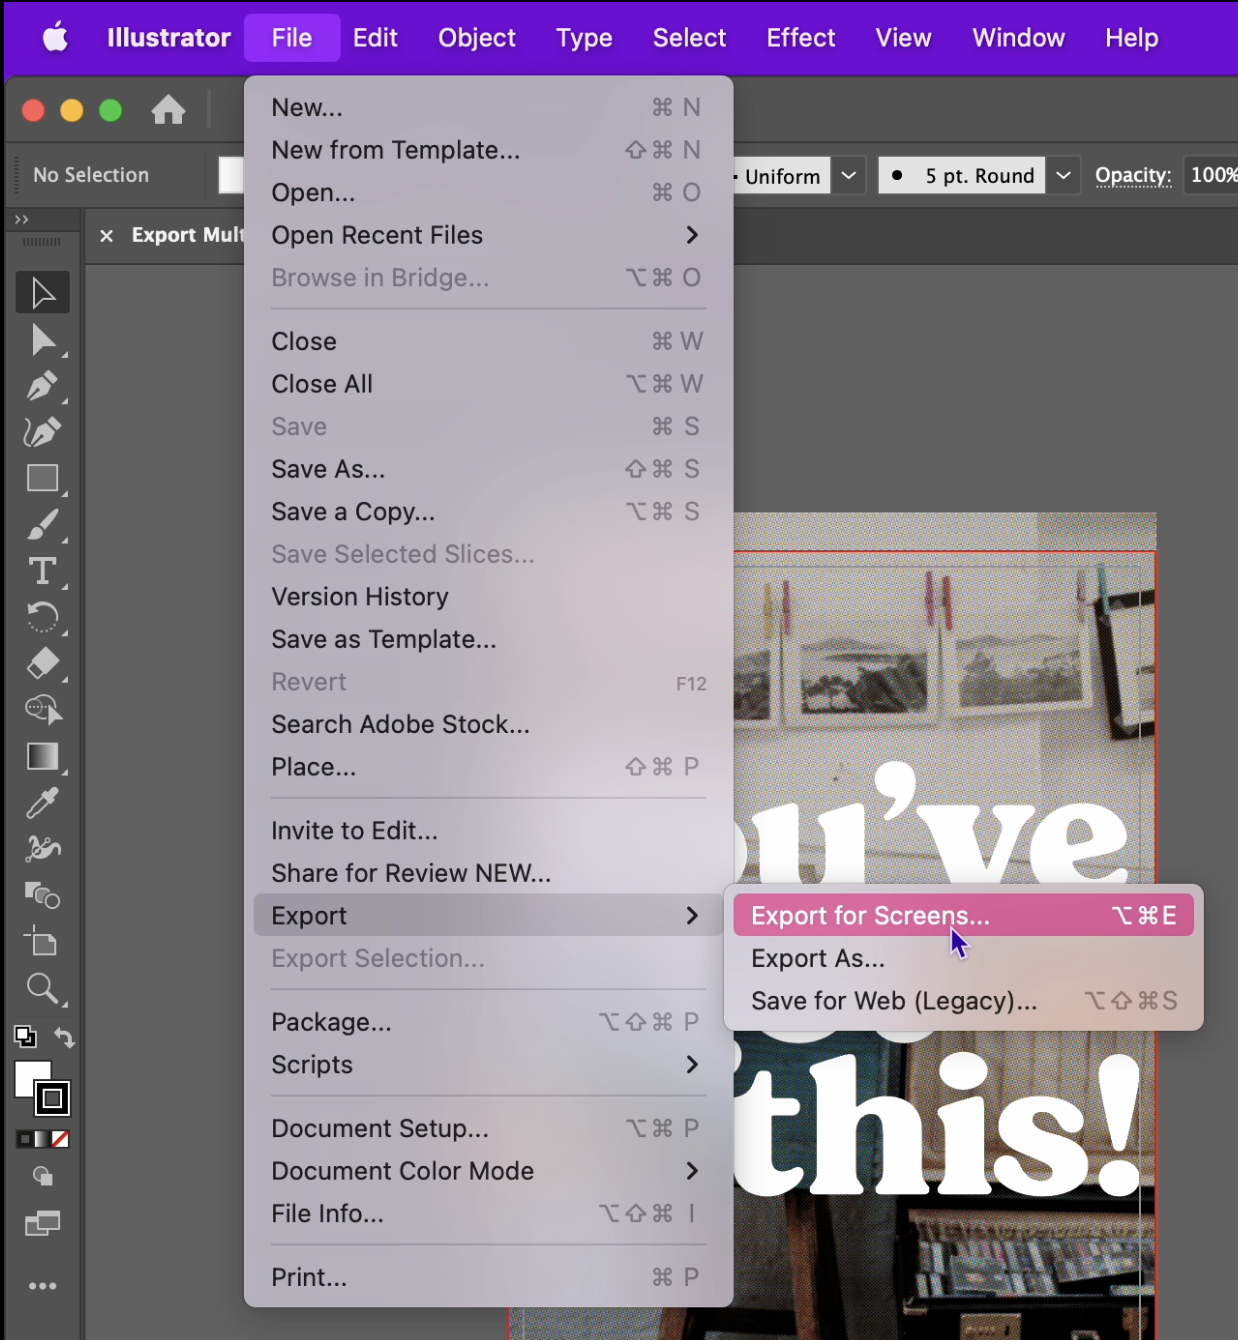
Step 3: Setting-Up Export for Screens
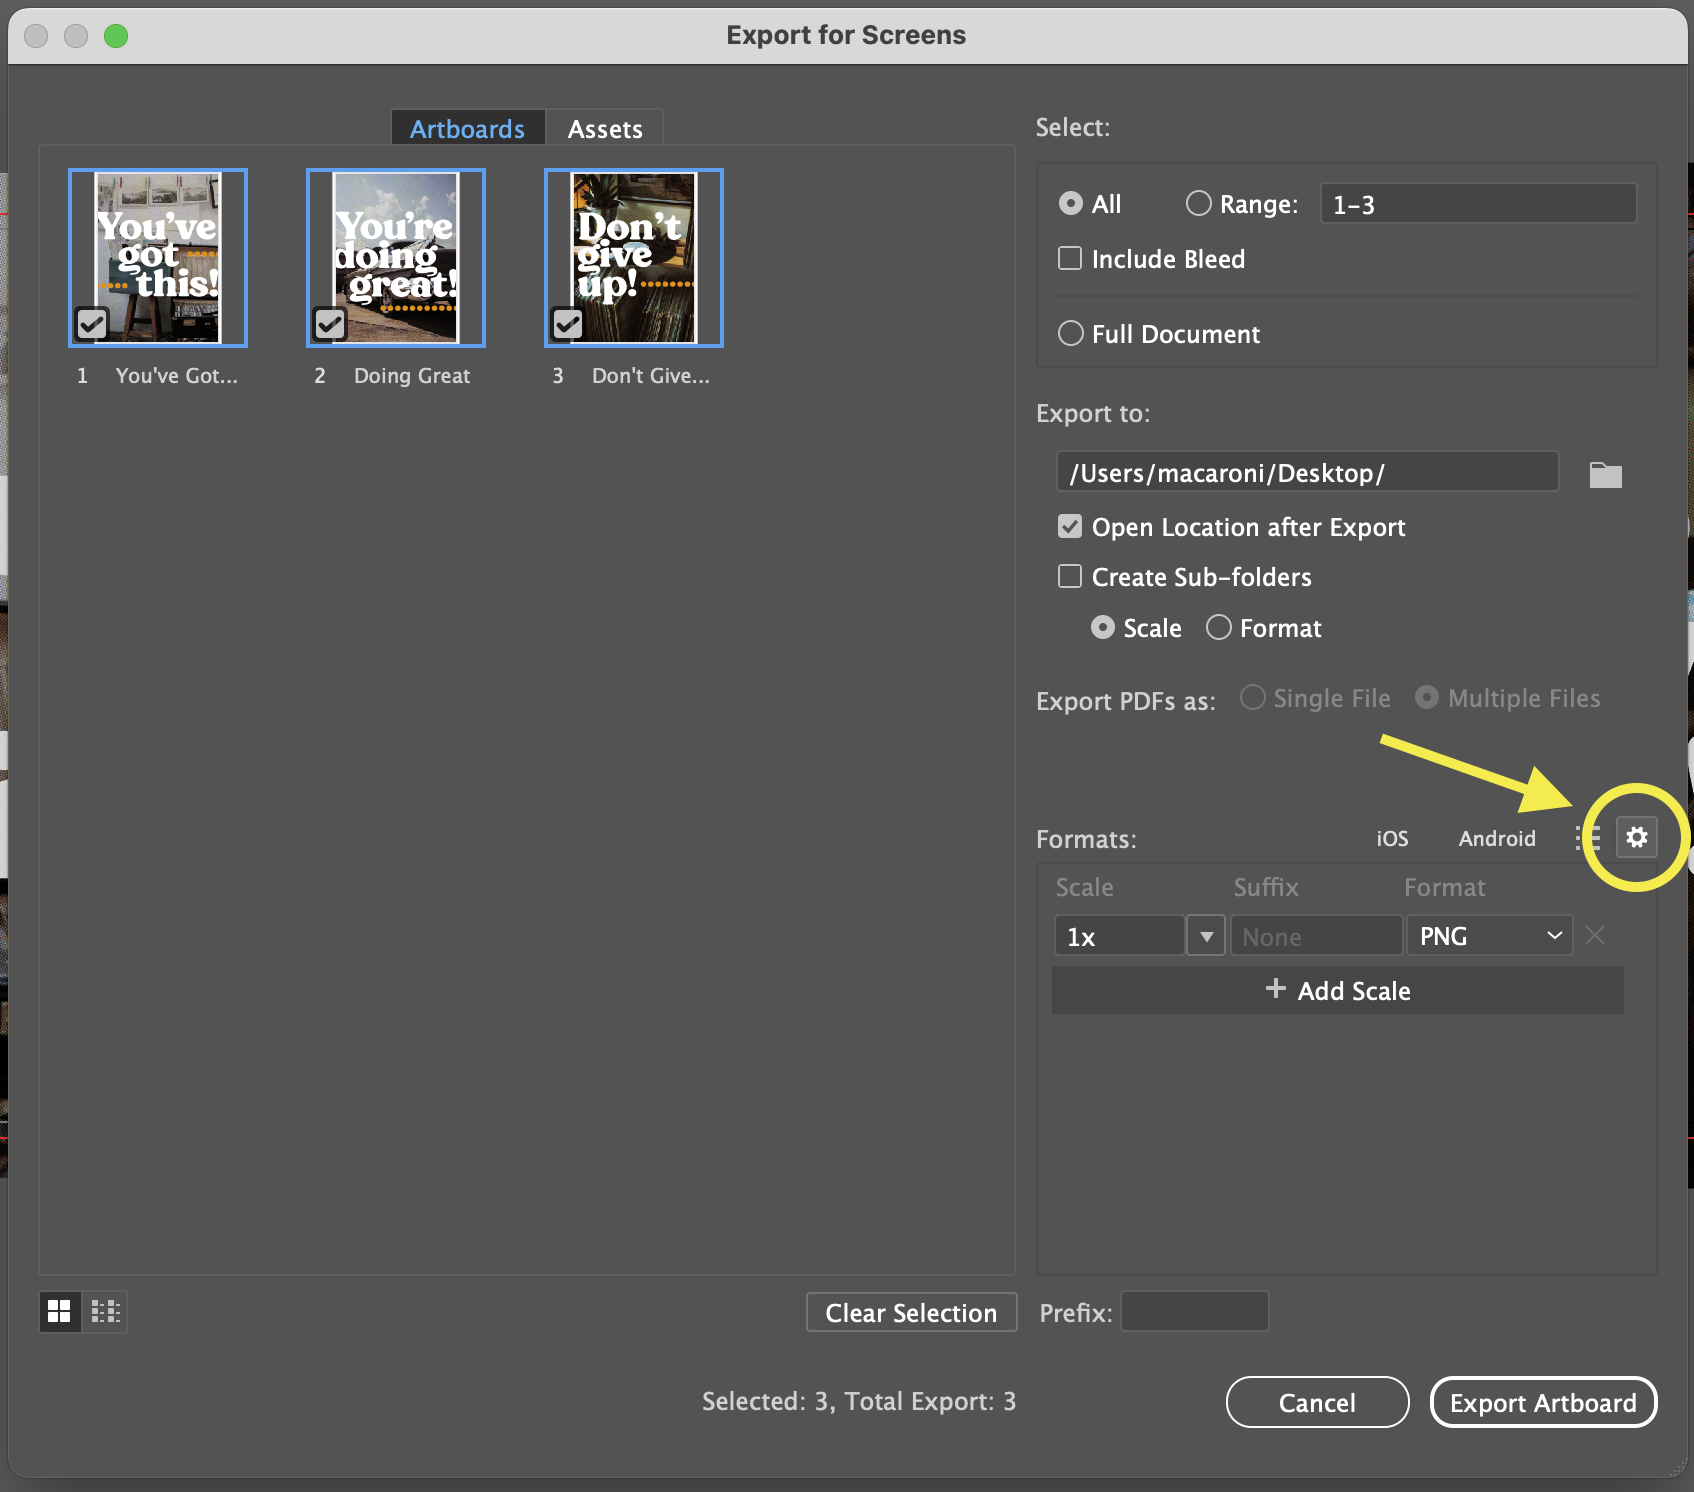
The Export for Screens tool is where we get that multiple PDF option. Click on File> Export > Export for Screens.
Here you can see all of your artboards in your file and you’ll see they have little check boxes so you can select which ones you need! I love using Export for Screens for a lot of my projects since the checkbox format adds a lot of flexibility.
Click on the gear icon to access the Advanced Settings
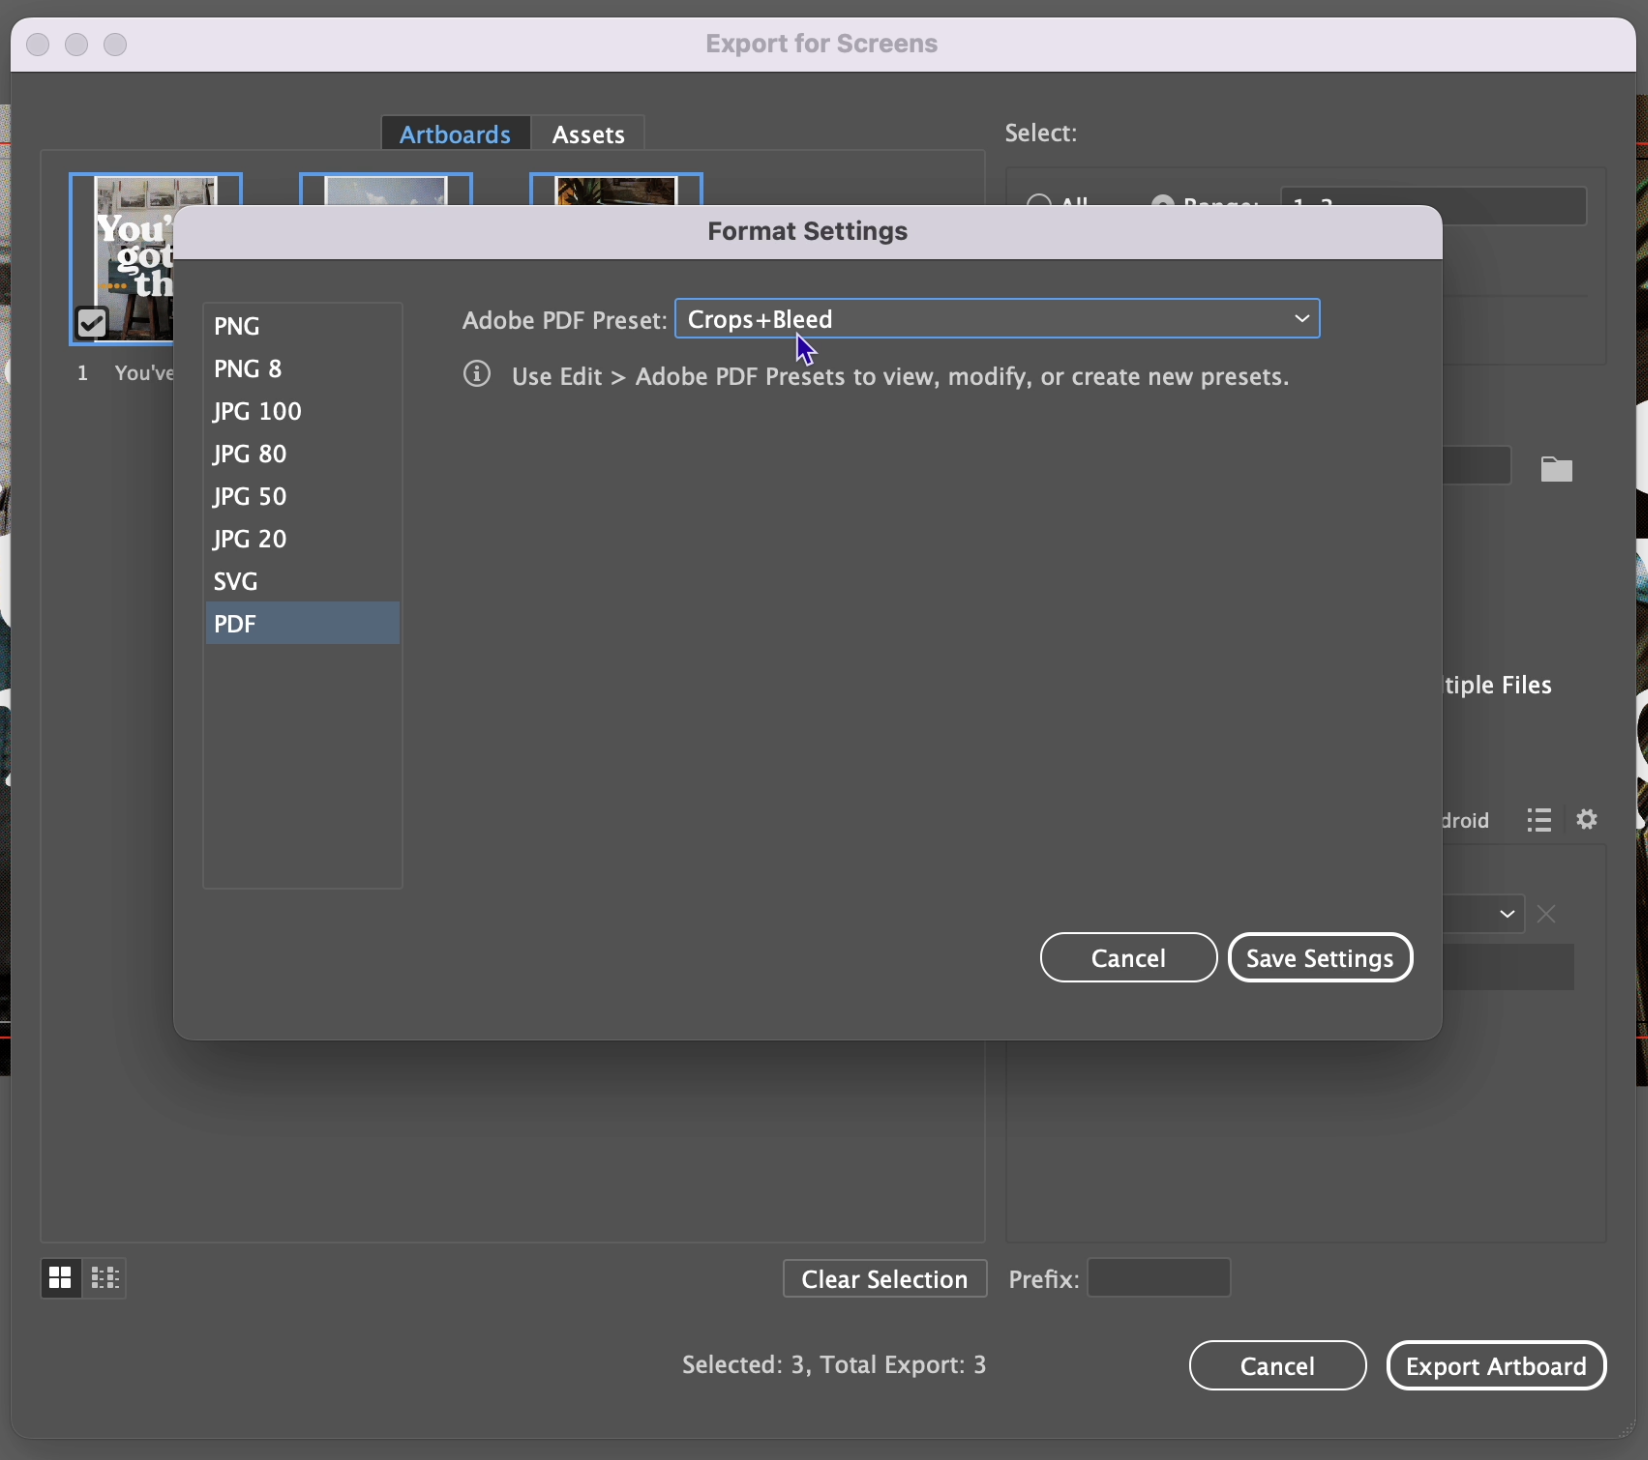
Then in the left sidebar select PDF, and then here you will choose the preset you just made from the dropdown. Then click Save.
Step 4: Export to PDFs
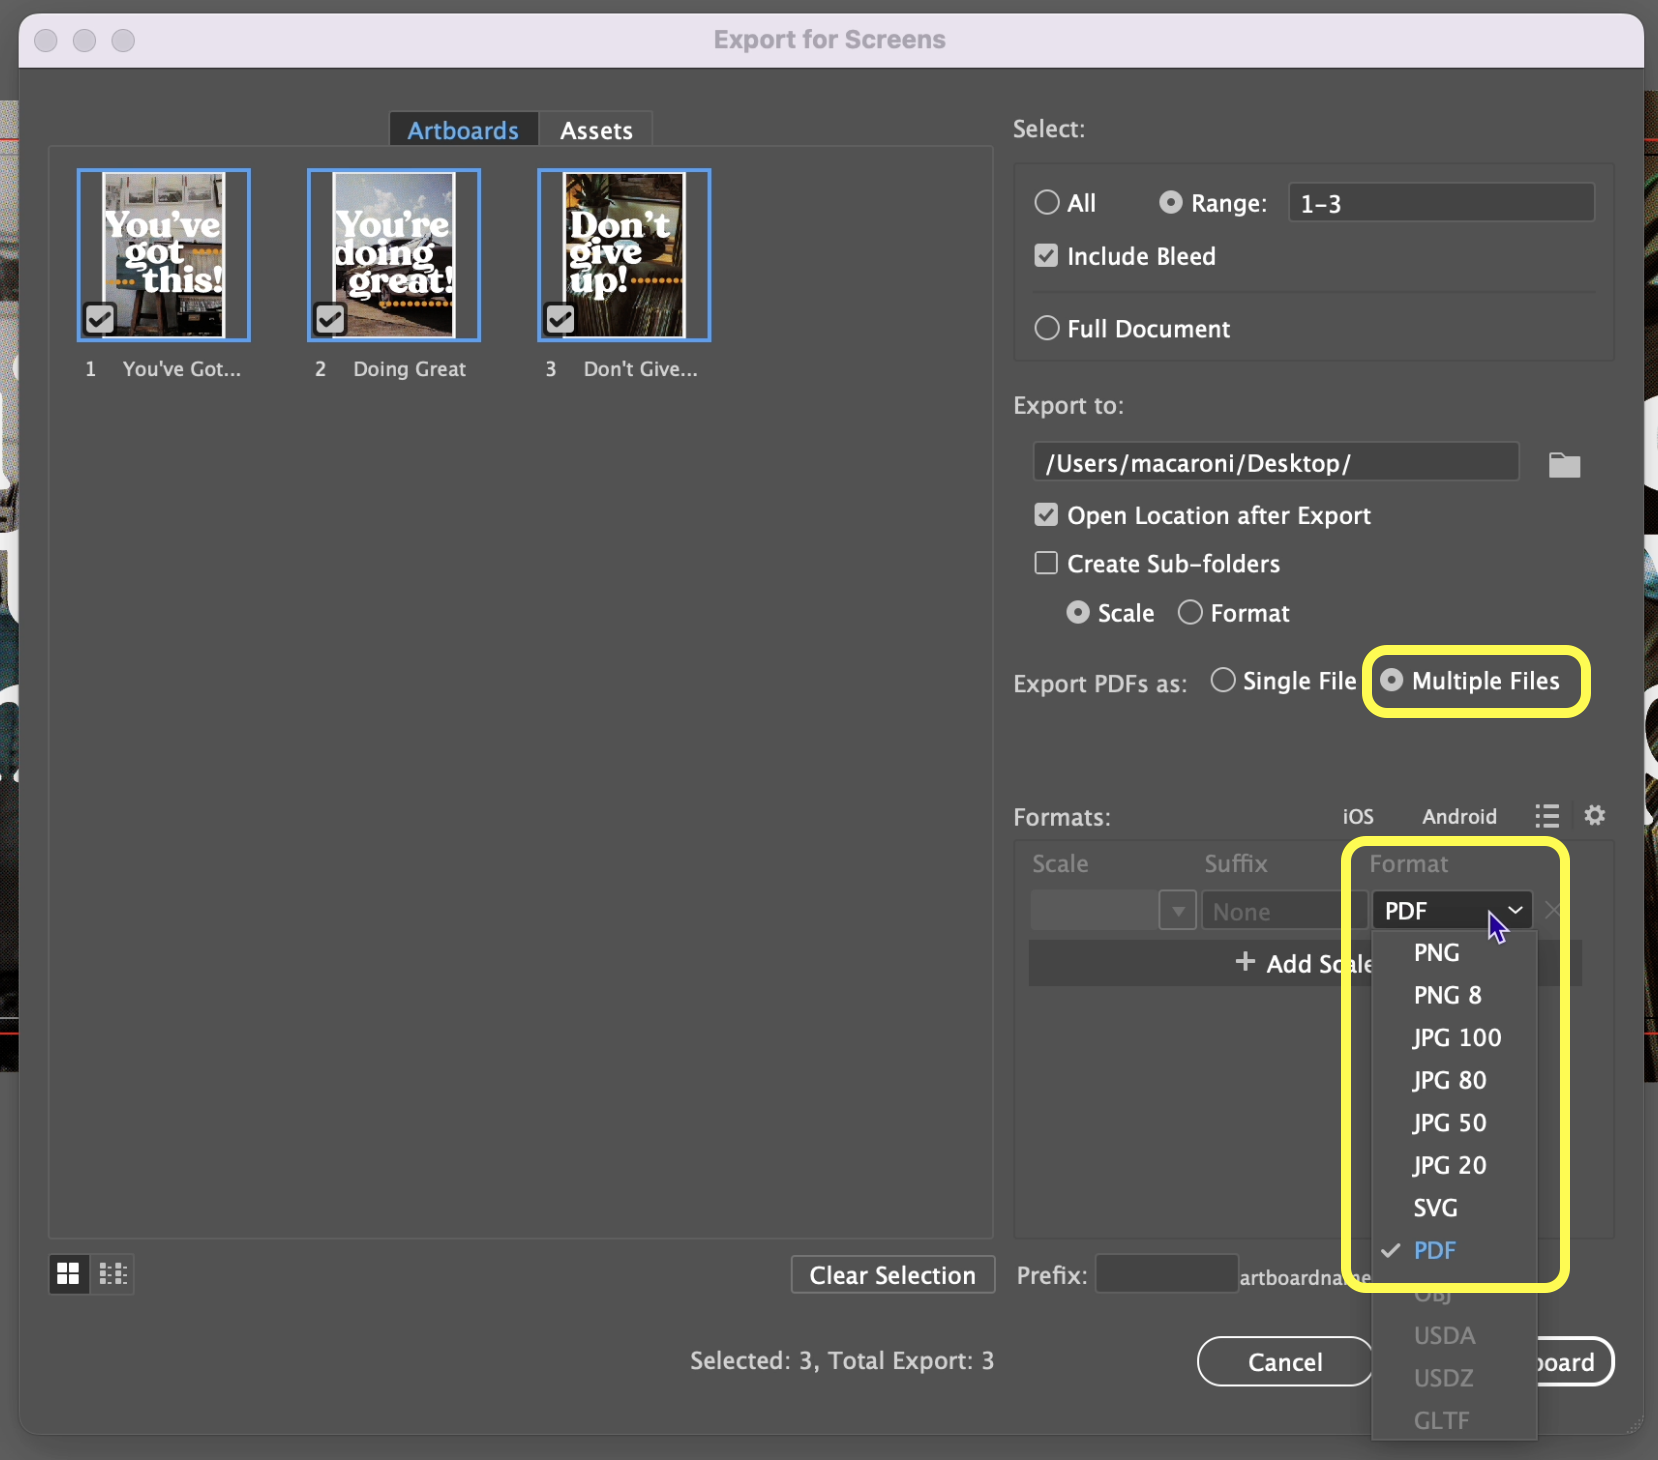
In the Format Dropdown, make sure PDF is selected. That will allow the 'Export PDF as' options of Single File or Multiple Files to be clickable. Select Multiple Files.
Use the checkmarks to choose which artboards to export. Also, ensure your artboards are titled correctly as this will become your PDF title. You can edit artboard titles by clicking on the text under the artboard previews.
Then click Export.
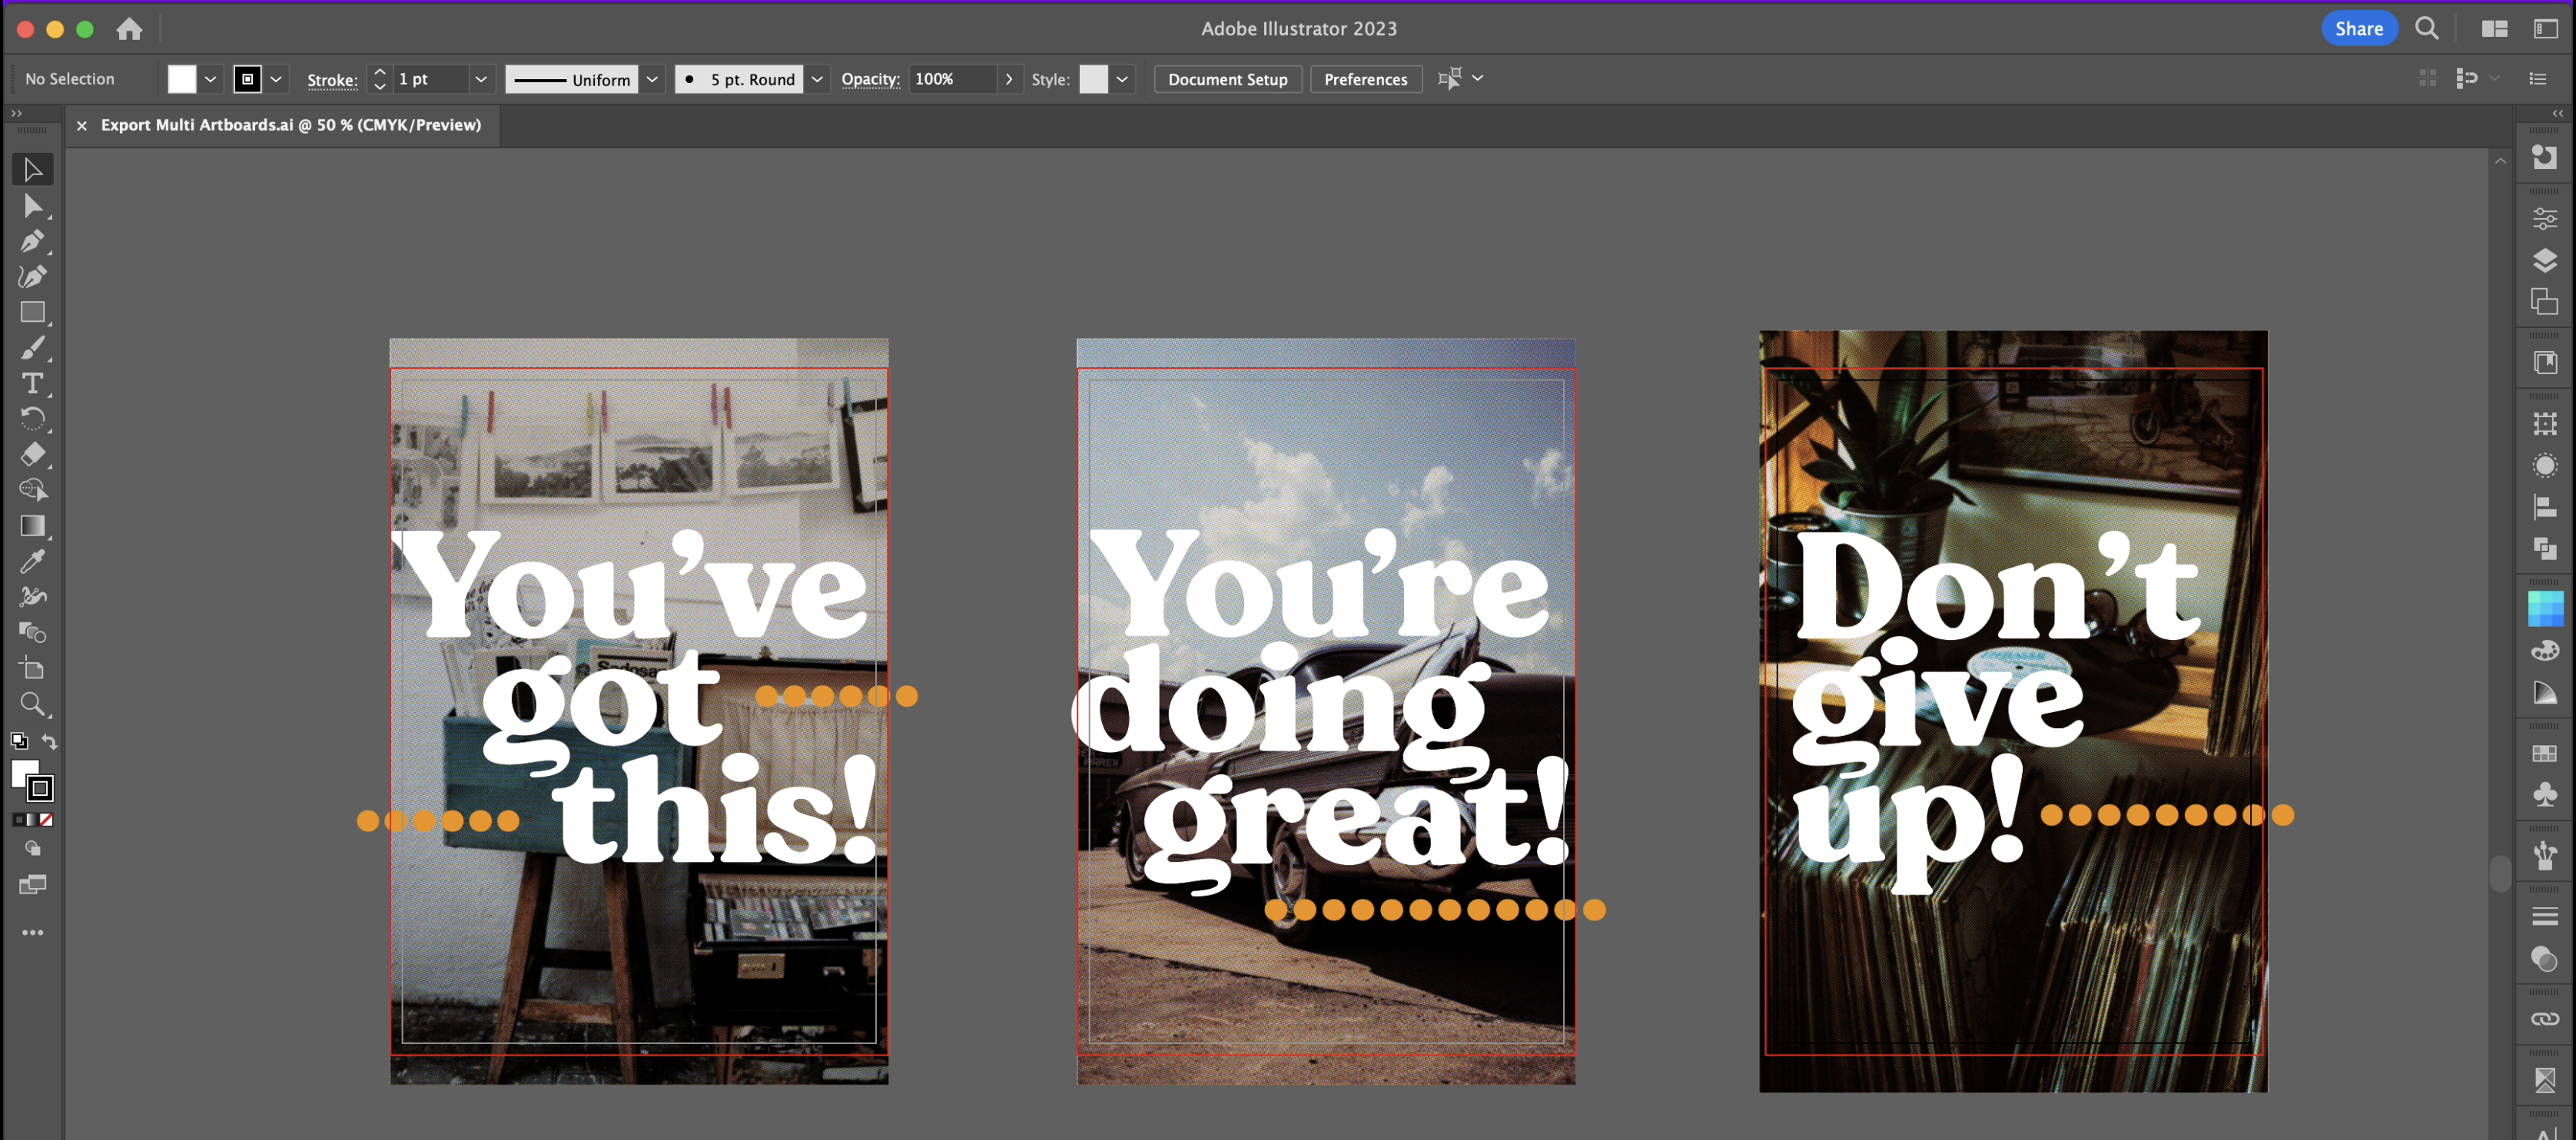
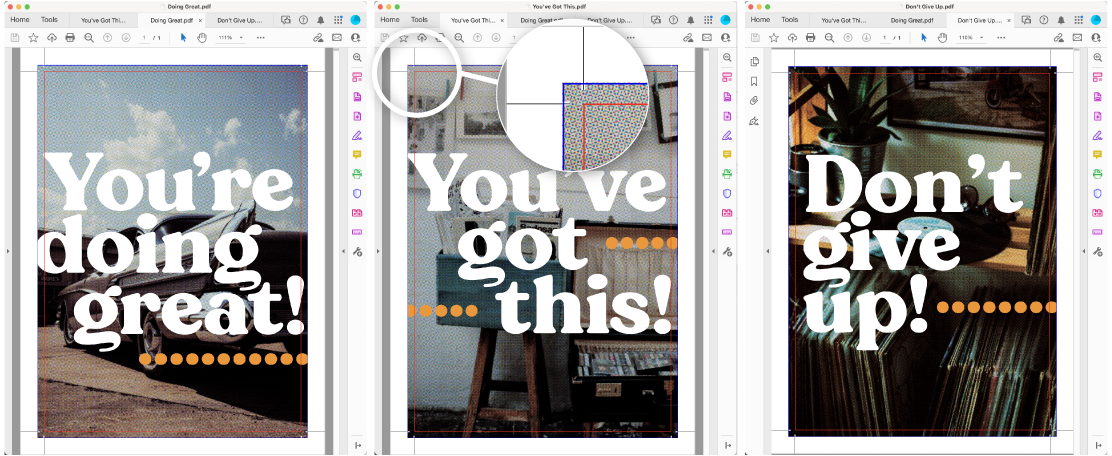
Voila! You now have three separate PDF files, each with crops and bleeds.
Exporting multiple print-ready PDF files from Illustrator is straightforward with these simple steps. Just remember to have your bleed set up properly before exporting. Plus now you have that PDF preset ready to use for other projects, even your multi-page ones. Happy exporting!
FREE DOWNLOAD
File export made easy with the Print-Ready Files Checklist!